( I am linking up with Fabric Tuesday at Quilt Story)
I’m not one to follow something just because “everybody is doing it”. In fact, if “everyone” is doing something, you can bet I’ll be going in the opposite direction. I’m just that stubborn and opinionated. With that being said, there is a popular bag pattern going around in the sewing/quilting blog world that caught my interest. I’ve read dozens of reviews of it before I purchased the pattern. (I’m also cheap and I prefer things that are free. But there are instances where even I will pay for a pattern.)
It first caught my eye do to it’s size. It looks like a very large bag! (Come to find out, it’s not really that large and the model on the cover of the pattern is just that short/small. But I digress…) I immediately thought of a particular person, for whom this bag would be perfect for! They do quite a bit of traveling and since this bag is touted as “the perfect weekend get-away bag”, I figured this would fit the bill. Plus, I’ve been wanting to make this person something, but their tastes are so not “hand-made”, that I was having difficulty coming up with something.
What intrigued me the most is how difficult the pattern was to make for most people. How can a bag pattern be that difficult? But then I had to remind myself that I’m a sewer 1st and a quilter 2nd. The differences may not be obvious to some, but if you sew or quilt, you understand my meaning. Being a sewer, or seamstress, I think in 3D: how will this seam curve over the shoulder?, how do I sew this placket so it lays flat?, would the skirt look best pleated, knife pleated, with inverted pleats, or gathered?, what is the easiest way to put in a zipper? So my approach to a project has me thinking in my head how each step will come together, visualizing them as I read the directions. On the flip side, someone who is a quilter 1st, thinks of things in more of a 1D way. I think most of the reviews that I read, concerning this pattern, are from quilters, which would account for various struggles that were talked about. Certainly, neither a sewer or a quilter is better than the other. I’m just pointing out the differences in the 2 “camps”.
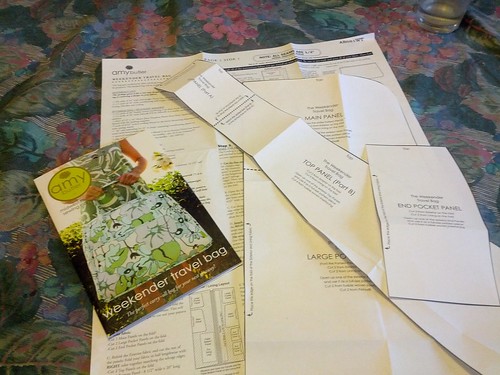
So I bought the pattern….
pulled my fabrics ( I was initially planning on making 3. Now I’m making 4). For my bag, I’m using the 5 FQ’s of “Flutter” by The Quilted Fish, bought from The Intrepid Thread, from my MIL for my birthday. Love this line! ….

and decided on the method I will use to put this baby together. (photo from Oh, Fransson! by Elizabeth Hartman. The photo is linked directly to her blog post about this bag. Here is where she gives a detailed tutorial about the quilt-as-you-go method used to make this bag.)
The pattern calls for home décor fabric, Peltex, a heavy-weight interfacing, and a medium-weight interfacing. Along with a plastic template (for the false bottom) and a 30” zipper. Many people reported spending close to $120 for this bag (which includes the patter cost)! Seriously?! For a bag?!!! Yeah, that’s not happening here! So I set out to make this bag as cheaply as I could, using what I have on hand. I did buy the zipper, piping, and plastic template stuff for the 3 bags, but that is all, coming to around $8 a bag because I had a Joann’s 50% off coupon.
I laid out the pattern pieces and discovered that it would take 4 1/2 fat quarters (18” x 22”) instead of the 1 5/8 yds of 54” wide fabric listed on the pattern (you will see below how I accomplished this). For the lining, I used a matching solid sheet that I had in my stash, so I didn’t measure it out, but I’m sure it’s not the 2 1/2 yds of fabrics listed on the pattern. Even if it is, though, it’s something from my stash and it’s a sheet from Wal*mart. So it’s totally replaceable.
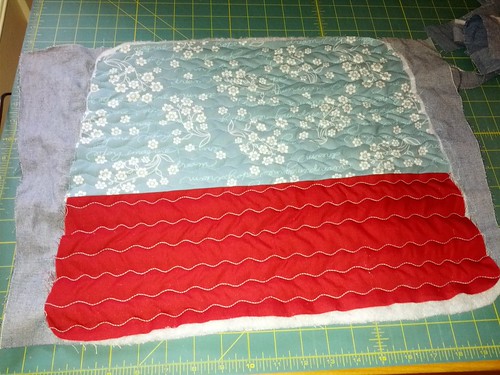
I started to quilt the panels, but in a different way then the above tutorial mentioned As you can see, I used the print fabric for the top part of the Main Panel and sewed the bottom with the same fabric as the lining. This is how I got away with using only 1 FQ for both Main Panels.
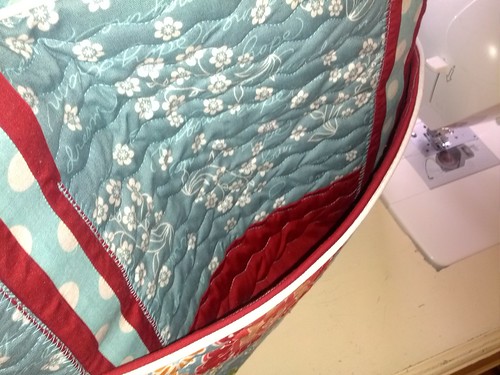
A close up of the quilting…

I did each piece in the same way, with denim on the bottom, batting in the middle, and the printed fabric on the outside. Once everything was quilted, I felt it wasn’t quite sturdy enough, since I quilted in a much less dense way then the above tutorial, so I added Heat n’ Bond to the back side of the denim. I then added another layer of denim to the back, since the Heat n’ Bond was exposed and I didn’t know how it would be in the wash. In retrospect, I don’t think I needed that extra layer of denim, and perhaps not even the Heat n’ Bond. If I had had regular interfacing, I would have used that instead.
Many people complained that the zipper was difficult to put it. But the pattern directs you to install it the way I have done for years, so I didn’t have a problem with it. And I wanted the handles to be wider and longer than the pattern called for, so I added the same fabric as the lining to add the width and I lengthened them 12”, making them 58” long each, instead of the 44” long.
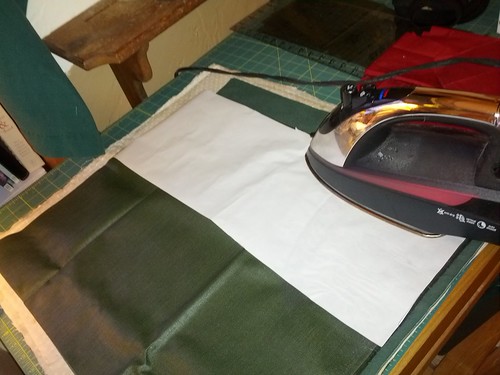
For the outside bottom, I used some Cordura fabric (the kind that they use for backpacks and covers for semi-trailers), of which we have an abundance of! I ironed some Heat n’ Bond to one side of it and layered another piece of the Cordura on the other side. Like I stated above, I didn’t use any Peltex or heavy-weight interfacing, so I wanted to make it as sturdy as possible. An added plus is that the Cordura fabric is water proof.
Once it was time to put the Main Panel to the Side Panels, I first used clothes pin to keep it together. But soon switched to a combo of clothes pine and strait pins.

Putting all the sides together, with all of the layers, was tough and my machine didn’t like me. But having patience and new needles made all of the difference! It sounds crazy, but when you are putting the 2 Main Panels onto the Side Panels, you will be much happier if you use a new heavy-weight (with the purple shaft) needle for each panel. I made the mistake of not sewing a 1/2” seam allowance, as stated in the pattern, so I had to go back to several places and re-stitch them so the fraying edges don’t show.
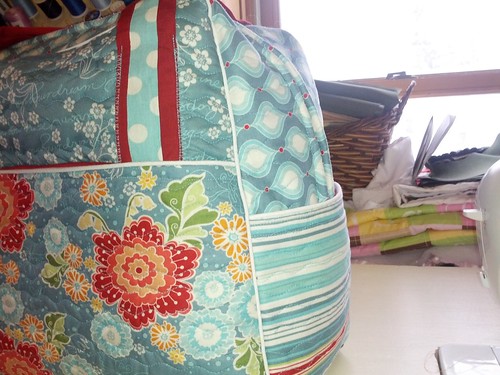
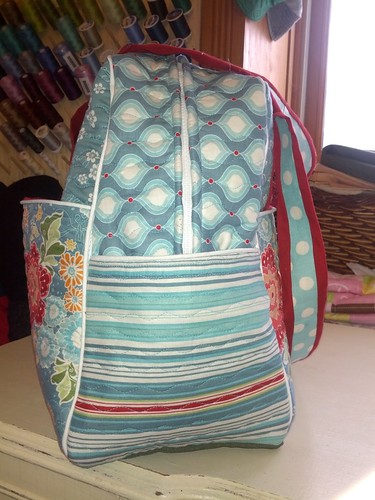
As you can see, the bottom part of the Main Panel, the red fabric, can’t be seen with the large pocket.
I added piping at the top of the the side pockets.
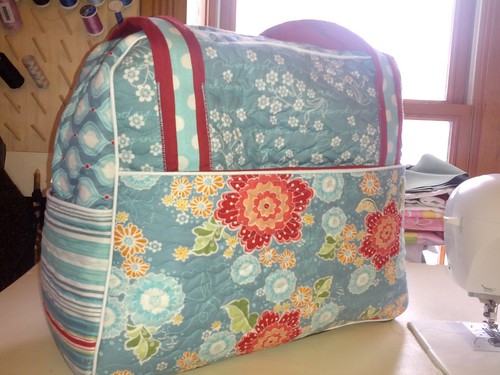
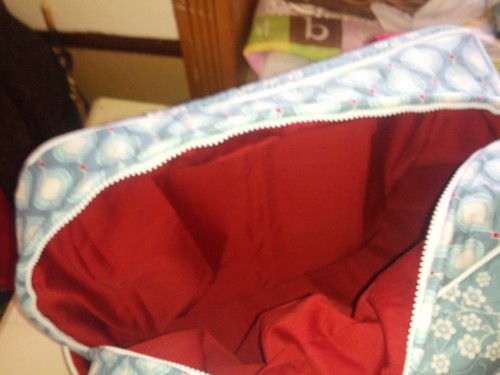
Here is a look into the bag. After this picture was taken, I tacked down the lining around the edges, so it’s not so loose anymore.
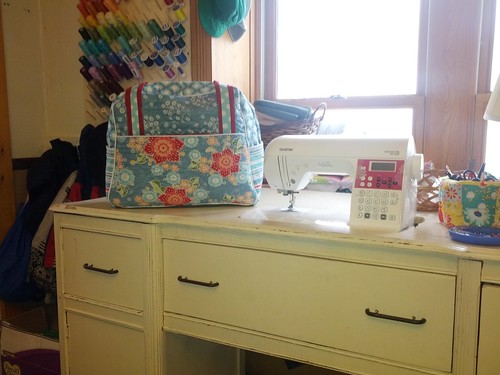
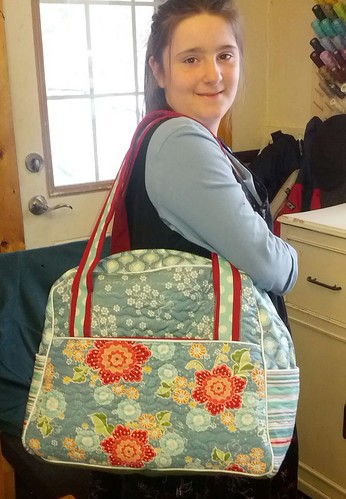
My 10 yr daughter is posing for me, to give an idea of the size of the bag.
I really like the bag! The colors are beautiful and so “me”. ![]() Some people like a more cohesive look, so using the same fabric throughout to bag would be a better choice. These are all from the same fabric line, so the colors all match, even though the prints are different. Since I like this bag so much, as we don’t really travel (hello, 9 people!), I’ve decided to use it as a diaper bag. I take the diaper bag everywhere! In fact, I haven’t carried a purse in years because 1 bag is about all I can manage to remember (and sometimes not even 1…). So I decided to use the bag as my diaper bag and I can enjoy it everyday!
Some people like a more cohesive look, so using the same fabric throughout to bag would be a better choice. These are all from the same fabric line, so the colors all match, even though the prints are different. Since I like this bag so much, as we don’t really travel (hello, 9 people!), I’ve decided to use it as a diaper bag. I take the diaper bag everywhere! In fact, I haven’t carried a purse in years because 1 bag is about all I can manage to remember (and sometimes not even 1…). So I decided to use the bag as my diaper bag and I can enjoy it everyday!
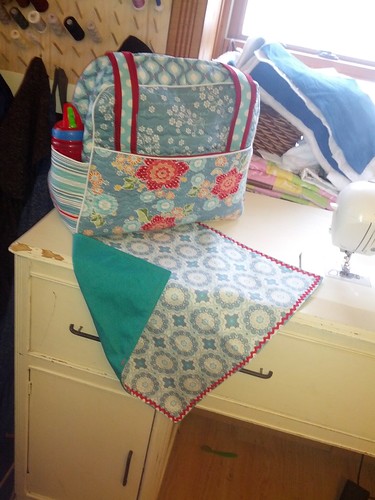
I made a matching changing pad from some teal Cordura and the last FQ I had from this line. As you can see, a sippy cup fits nicely in the side pockets and the changing pad stores well in the large pocket.
LOVE IT!!!
I’m already starting on my next bag, for my sister. There are things that I’m doing differently, such as I’m quilting it very much like the tutorial mentioned at the beginning. Once I’ve got that one done, I’ll do a review of it as well, to note the things I’ve changed and how I think they worked. Hopefully, someone finds my review here helpful, esp. if you want to use the materials you have on hand. It can be done!
I love it! It looks like it would make a wonderful diaper bag!
It is so far! I can get Caleb’s diapers/wipes, his change of clothes, Damaris’s change of clothes, plus all the other “stuff” that seems to crawl into our diaper bags, all with room to spare! Which means I can get another little’s diapers in there with no problem! Let me know if you would be interested in one. I’m sure we can work something out! *wink*
I love yor bag!
This is great! Love the details you’ve given! It’s perfect!
Well done! It looks great. 😀
I love the color choices 🙂 Great finish.
his bag is wonderfull, congratulations !