
I have made 5 of these wonderful bags ( #1, #4, #5. Sadly, I didn’t get a picture of #2 {but it is made similar to this one, only with purple, green, and white} and I haven’t gotten around to getting a picture of #3) so far and so I thought I’d write some tips and tricks that I have found to make this bag easier to conquer.
Before we start, there is something you should know about me: I’m cheap frugal. I don’t have much to spend in the way of supplies (and if I had the income to dispose of, I’m not so sure I’d spend it on myself, anyway. Unless it’s to go out to eat. I LOVE eating out!). In light of my frugality, I did as much research about this pattern as I could. I found a Flickr forum that talked about how much supplies would cost to make on of these bags. That sum just blew my mind: $120! Are you serious?? On a bag??!
I knew there had to be a cheaper way and still make something beautiful. I’ve been sewing for a long time, and I’m not afraid to find different materials and ways to make something. Plus, I look at it as a challenge and I love me a challenge! ![]() Once I had the pattern, I was able to lay it out, read it, and come up with a plan. By the way, I have yet to use all of the called-for supplies, too.
Once I had the pattern, I was able to lay it out, read it, and come up with a plan. By the way, I have yet to use all of the called-for supplies, too.
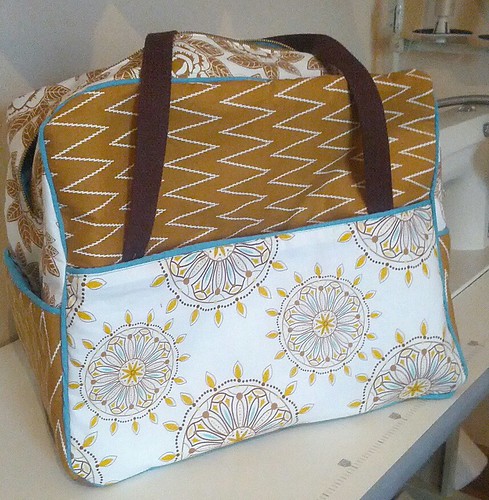
1. The patter calls for upholstery fabric, of medium weight. I have used quilting cotton in all of my bags, and they come out just fine. Believe it or not, 5 fat quarters are enough for the outside of the bag (not including the bottom) as seen in this bag:
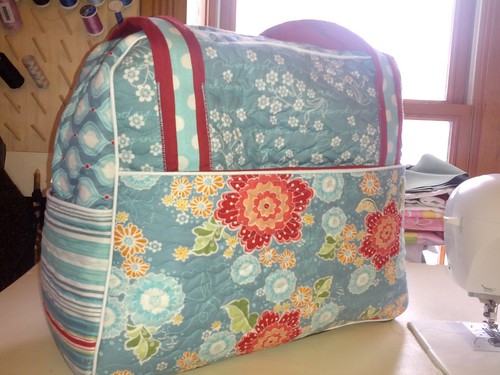
As you can see in this picture, the red fabric starts just below the top of the pocket so the red is not seen. This is how you can get that front panel out of 1 fat quarter.
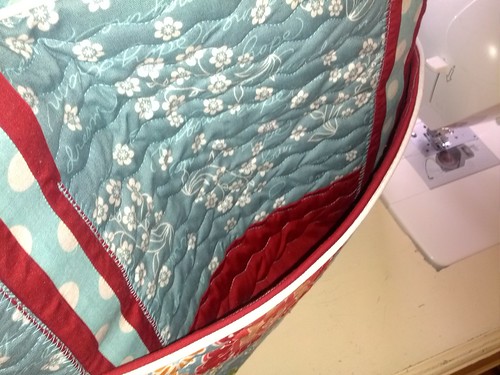
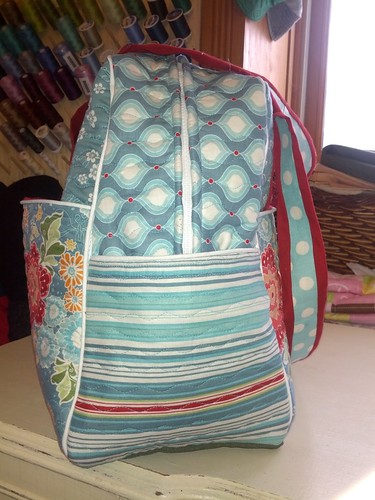
2. Heavy, sturdy interfacing works very well. I use Pellon 926W1 sew ins stabilizer with great results. Doing the quilt-as-you-go method also works very well, as seen in this bag:

3. If you are of average height or taller, you’ll want to add some length to your handles. If you are wanting to add a shoulder strap as well or instead, attach the strap below the zipper at the side pockets.

4. Using a zipper foot or a piping foot to attach the front panel to the zippered panel makes things a whole lot easier! But if you don’t have on of those, it can be done with a walking foot.
5. The pattern piece for the bottom I have found is 2” too short. Cutting it 8.5” x 18” took care of this problem. Also, I have found the side pockets to be too narrow, so I have added 1.5” to make it line up with the zippered panel.
6. Some people have used purse feet for the bottom, but that isn’t something I have wanted to invest it (yet). I do, however, have quite a bit of Cordura fabric (the material that is used in backpacks, semi-trailer tarps, and the like), so I have used that on the bottom of all my bags to help with waterproofing. You just never know where those bags are going to land!
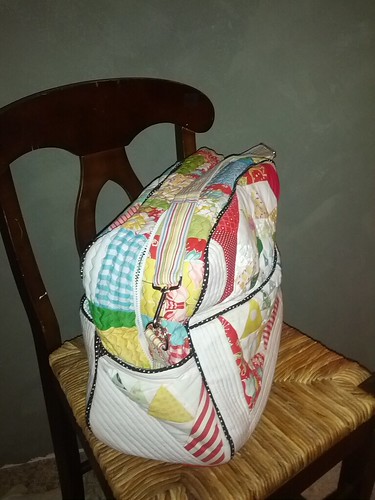
7. The pattern says to make your own piping. There is only Walmart that has any type of craft supplies near us and they don’t carry piping cord. That leaves me with the pre-done stuff and 2 packages of that works fine. You can always cover it if you want a particular color or print to match your bag, like I did with these two bags:

Of course, you can always skip the piping, which looks fine too.

8. Add your own flair to your bag! There are many different things you could do. Use twill tape for the handles,
or quilt them.
If you’d like a shoulder strap, try covering an one from an old bag (like the one with black piping, seen above) or make one of your own using whatever hardware you have laying around.

You can make the lining match the bag perfectly or have it coordinate but not match.

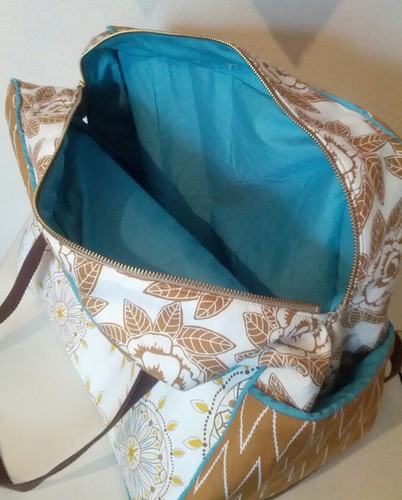

I have made these bags with both the plastic teeth zippers and the metal teeth ones (as seen 2 pictures up). It just depends on the look that you’re going for.
Sometimes, things happen that makes you look really good. ![]()

So there you have it, my tips and tricks. Don’t be afraid of this pattern. It can be done with a very modest budget (you might have everything you need already!) and you, too, can have a wonderful, huge bag! This grey bag was made as a diaper bag for a friend. The teal and red bag is my diaper bag and it makes a fabulous diaper bag!!
Did I mention it was huge?
I am linking up with Crazy Mom Quilts and Confessions of a fabric addict!
Now, that is a bag! Love some of the fabrics you have used
I’m impressed by all these weekenders! I have yet to make the first one, and I’ve had the pattern for a few years.
Your bags are beautiful! You really know how to put the fabrics together. Thank you for sharing all the tips and pics.
~Janie
Those are awesome bags! I had no idea they were so big, haha.
Great bags!! Thank you so much for the tips! I’m going to have to try these out 🙂
Beautiful bags and great tips on how to manage the pattern. I’ve made a few bags but haven’t dared this one yet. You are inspiring me!